8 July 2010

A is for Attitude

I have recently found the blog Lottie Loves which just called out to me - Lottie is a fabulous woman who loves vintage, sewing and dresses (amongst other things) and well, how could I not love someone who loves those things?!

Lottie is currently running a series of tasks called "Finishing School" - basically, it is a workshop to help you feel more fabulous and feminine. So, I have decided to give it a go!

The first task is A for Attitude. The task is this:
"Which bits of you do you like, which bits of you do you love? What have you achieved that you look at with satisfaction and joy? What do you like about your body? What do you love about being the woman you are? I want nothing negative, no buts just pure ‘this is what I like/love because…..’"

So, here goes!

Firstly, I love my shoulders and collarbones. I don't even know what it is about this area of my body, I think it just always looks toned and catches the sun first - I feel very glamorous wearing a halterneck or off-shoulder top.

I also love my nails - I am lucky to have strong nails which I can grow very long. I used to paint all sorts of nail art on them when I was younger - now I prefer to leave them natural, but feminine.

I love and am proud of the fact that I am a very loyal friend. If you are a good friend of mine, I would go to the end of the earth and back for you, without even a moment's hesitation. I would always always be there for a friend if they needed me (I'd probably even be there for people who weren't friends either - it's just the sort of person I am!). I hope my friends all know this.

I love the fact that as I get older, I am becoming more and more feminine. I used to live in jeans, very rarely wore a skirt - I just felt more comfortable in jeans or trousers. Now, however, I have gone the other way. I love the way I feel when I am wearing a skirt or dress - I love feeling feminine.

I love my creative side, and that I can attempt all sorts of different crafts - taking a few starting materials and turning them into something new is something that makes me very happy.

Finally, I love my smile - I've often had compliments on it, and I love to use it as often as I can!

How about you - what do you love about yourself?

25 July 2009

Boojiboo Flirty Apron GUEST GIVEAWAY!!!!

For all you lovely readers out there, I have a great link and website to share with you!

Boojiboo Flirty Apron GUEST GIVEAWAY!!!!

They are currently running a number of giveaways, one of which is the one linked above. The giveaway is for a fantastic apron from Boojiboo, who you should definitely check out - her aprons are absolutely adorable! I shall definitely be saving up for one, and look forward to looking cute as I bake goodies in the kitchen!

16 May 2009

Four Good Corners


I have been invited to be a blogger on Four Good Corners, a blog from a group of crafters all over the world (although mainly in the UK) about "Making things, doing things".

I am very excited about this and have just published my first post - go have a look!

24 April 2009

Please sponsor us!


Day 58/365, originally uploaded by Fearful Penguin.

On 10th May, Erica and Emily will be striding out to help people affected by cancer. We will be doing the Shipley Stride sponsored walk in aid of Macmillan Cancer Support.

Macmillan Cancer Support provide practical, medical, emotional and financial support to those affected by cancer, and their families. They also push for better cancer care. They make a real difference to the lives of people affected by cancer and I want to help to make sure they continue to do so.

We would be grateful for any donations, large or small, so if you can afford to give anything at all, please do, to help Macmillan carry on their vital work.


18 April 2009

Just Add Water


Well, I have to admit, I've been suffering from "artist's block" recently - I just haven't had the inspiration or the motivation to create. I was like this bath ballistic when it was sat on the side, just waiting. Once I but the bath ballistic into the water, however, it came alive, fizzing and turning and bubbling away.

A friend of mine has asked me to design and make the invitations for her wedding - we discussed a few ideas and all of a sudden it is like I have been put into the water - I can't wait to get started! I have spent time together looking through various ideas online, and I'm looking forward to going craft shopping on Monday to get the items needs to put together a few samples.

So now I have the motivation, the inspiration just followed naturally. I love it when that happens!

20 March 2009

Like a forgotten friend....


..........who reappears after many years lost...... I will be back!

Just give me a week or so....

Apologies for the absence. But hey! How have you been? Tell me ALL about what you've been up to!

25 October 2008

Help to knit the World's Longest Scarf!


I was recently told my a friend of mine that she had started knitting a scarf. nothing unusual there, except this friend really isn't the knitting type. When I asked why she was knitting it, she told me about Jenny Chant, and as soon as she told me, I knew I had to do all I could to help, too.

Jenny Chant has gone through more than I could even imagine - having survived cancer three times, she has now set up the Jenny Chant Appeal to help with education and support for sufferers and their families.

And now - to where you can help! In order to raise money, she has decided to knit the world's longest scarf. However, this would take her 259 years if she attempted this on her own! Therefore, she is looking for people to knit and donate pink scarves for her to add to this record attempt.

There are more details on her website - www.jennychant.co.uk - please do visit to see how you can help. There are two difficulties of pattern, and even if you can't knit there are other ways in which you can help. At the very least, please spread the word about this appeal to anyone know know who you think may be able to help.

Thank you! I'm off to find some pink wool now!

12 October 2008

Home again, home again!

After a fabulous time in Los Angeles, and settling into my new job, I have finally found a few minutes to sit down and try and catch up! Due to downsizing, I am having to sort through all my craft room, and organise what I can, and cut down on the amount I have - unfortunately, due to moving house soon, I will no longer be able to have a room dedicated to my crafts. I am already mourning this loss, and we haven't found a house yet!

However, this is good news for you! Due to this, I shall be giving away some of my craft items, so keep an eye on this blog for my next giveaway!

I am missing being crafty and need to get my fix another way, so I'm relying on you - what crafty projects have you been up to lately? I'd love to hear about them!

29 August 2008

My Absence


I just wanted to make a quick post to apologise for my absence here over the last month - my time has been taken up for two reasons:

1. I have been made redundant from my job so am in the process of job hunting which takes a lot of time and effort.. (If only I could just fall into my dream job, but unfortunately it doesn't seem to happen that way!)

2. In 3 weeks time I will be going to Los Angeles for 2 weeks, so have been getting excited and distracted thinking about that! So excited!

Rest assured I am keeping up to date with all orders, and that I am working on new items for the store when I get some spare time. So look out for an update soon!

29 July 2008

Typewriter jewellery!

Whilst reading Suburose blog, I noticed her most recent giveaway, and I fell in love instantly! It is a bracelet made from the number keys from an old typewriter - I absolutely adore it!


This bracelet is made by Keysandmemories at Etsy, and there are many other wonderful bracelets - I would highly recommend checking her out!

19 July 2008

Bloomin' marvellous!


Whilst browsing Etsy, I found a this wonderful shop, porridgepapers, who make handmade paper. I was especially enamoured by their pinwheel girl card above, which, along with some of their other cards, is plantable and has seeds in the paper, so once the card is finished with you can plant it and grow some pretty plants with it too!

If I ever received one, I'm not sure whether I would want to plant it as it is so pretty, but what a wonderful idea!

12 July 2008

Flickr Game!

I saw this game on another blog, suburose.com and I loved the idea so I just had to have a go myself!

Firstly, here is my mosaic!


The concept:
a. Type your answer to each of the questions below into Flickr Search.
b. Using only the first page, pick an image.
c. Copy and paste each of the URLs for the images into fd’s mosaic maker.


The Questions:
1. What is your first name?
2. What is your favorite food?
3. What high school did you go to?
4. What is your favorite color?
5. Who is your celebrity crush?
6. Favorite drink?
7. Dream vacation?
8. Favorite dessert?
9. What you want to be when you grow up?
10. What do you love most in life?
11. One Word to describe you.
12. Your flickr name


Have a go, and don't forget to link back to yours in the comments - I'd love to see how yours turned out! :)

I've been featured!

Check out Going Handmade - it is a website which regularly features interviews with different crafters - a great way to find new inspiration and also wonderful items to buy!

24 June 2008

Featuring: Feltlikestitchin!


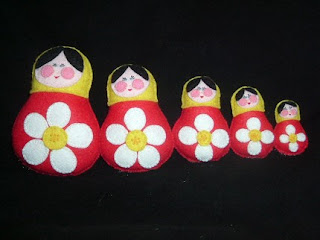
I am taking this opportunity to introduce you all to someone who makes and sells the most adorable hand stitched felt DiDi Dolls. Claire sells monsters, animals, Mr Potato Head, celebrity dolls and much more! She also also make badges, keyrings, Christmas ornaments, applique patches - all sorts of felt novelties. Here is what she had to say in my mini interview!

"I live in Yorkshire, England. My day job involves looking after all the pensioners who live on my street, which is a really fun challenging job. I spend all the rest of my time stitching and running my Etsy store."
"I've always been a stitcher - I can't remember the first time I used a needle and thread, it just seems to have always been there! I sew everything by hand. If I try I can sew most things but I don't enjoy making clothes and cushions and such like - I only want to stitch fun stuff. I adore all embroidery and decorative stitching. I've done tons of cross stitch over the years and I've even won prizes for my cross stitch designs in two UK magazines. These days most of my time is spent creating my felt dolls."

"I think my favourite item at the moment is the one which took the most work. This set of Matryoshka Dolls (right) took a lot of hours to make but I'm proud of how they turned out. "
I also asked Claire to recommend another site to us, to which she replied,
"I'd love to recommend this beautiful Etsy store. http://feltingarts.etsy.com/ This German artist has the most amazing needlefelt creations - I'm in love with the Strawberry Baby. "

Claire's DiDi Dolls are available at:

12 June 2008

My Relaxing Afternoon


There is something about being outside when the sky is so clear and blue, and the sun is shining. It just feels as though nothing could go wrong, nothing could be more perfect than you just being in the fresh air, taking it all in. Everything just looks so much better, even the trees look greener and more vibrant and full of life.

People in general always seem so much happier and friendly in the sun. Maybe it is because I am feeling happier that I notice it more. Maybe it is because people don't feel the need to rush so much in the sun. Maybe it is because they have all been sitting in beer gardens drinking! Either way, I love walking out when the sun in shining, and smiling and saying hello to so many people.

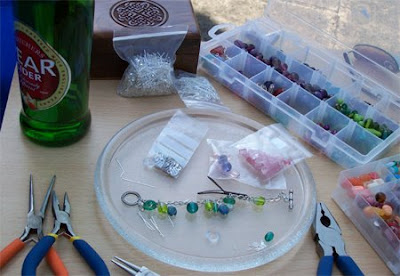
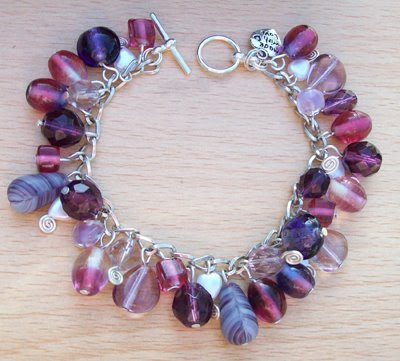
I spent an afternoon sat outside in my back garden in the sun, relaxing and making jewellery. I made a few new items for the store, and I also made some beautiful (if I may say so myself!) charm-style bracelets, which I am very proud of. I think they look really pretty and stylish, and they make a great sound when you wear them!

That afternoon was so much more relaxing and contented than any other afternoon I have spent crafting. Maybe it was the pear cider. Or maybe, the sun does bring out the best in people.

2 June 2008

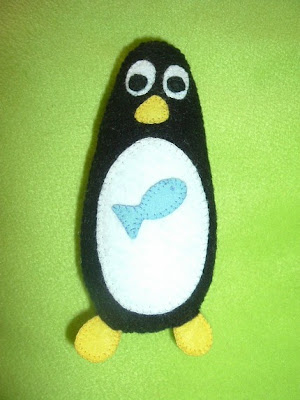
Fearful Penguin!


"Fearful Penguin had stood on his head, hopped on one leg, turned somersaults and waggled his flippers....

...But it wasn't until he'd torn off a loud squeaky fart that he managed to get a laugh out of Emily."

I got this as a birthday card from my parents and I loved it so much I framed it to put on the wall, and I couldn't resist sharing with you all!

I am currently working on some new jewellery for the store, so keep checking back!

Have a great day!

26 May 2008

Yummy Banana Muffins!


I made some of these muffins a few weeks ago, and everyone loved them (as you can tell, I was so proud that I didn't even want to wait to take them out of the tray and arrange them before taking pics - I just wanted to eat them!!). I then lost the recipe and was gutted! I have since found the recipe again, and so I am going to share it with you, both so you can make lovely muffins too, and so that I always know where it is!

You will need:

2 eggs
240ml milk (I used semi-skimmed)
120ml vegetable oil
100g granulated sugar (I used the low-cal stuff to make these slightly better for you!)
100g soft brown sugar
375g plain flour
4 teaspoons baking power
1 teaspoon salt
1 teaspoon cinnamon (optional!)
2 small bananas, roughly chopped

To make:
  1. Preheat oven to 200 degrees/gas mark 6.
  2. Sift the flour, baking powder and salt into a bowl, ensuring they are thoroughly mixed.
  3. In another large bowl, add the eggs, milk, oil and sugar, and beat together.
  4. Add the flour mix to the liquid mixture and roughly mix. Do not worry about getting a smooth mixture!
  5. Stir in the bananas and the cinnamon.
  6. Spoon the mixture evenly into 12 muffin cases, and bake for 25 minutes.
Yum! Ensure that when you take them out, if you put a knife into them it comes out clean - if not, cook for a further 5 minutes. Allow to cool, and then eat! :)

You can try this recipe with other fruit - I intend to try it with apples and slightly more cinnamon next time - tasty goodness!

14 May 2008

Tea Bag Folding - Tutorial


Since it has been a while since my last blog, I thought I would treat you to my first tutorial! One craft I loved when I was paper crafting a lot was origami, and tea bag folding follows similar techniques to create pretty rosettes!

Tea bag folding got its name as it was originally done with the little "envelopes" that tea bags came in, as these were usually decorated papers which looked lovely as rosettes. Nowadays, these envelopes are more rare, but this technique can be done with any paper. Only one side of the paper will show, so do not worry if the paper you have is only decorated on one side.


You Will Need:


* 8 squares of paper (all the same size)
* Glue


1. Take one of the squares, and fold it in half horizontally, decorated side inwards. Unfold.


2. Now fold diagonally, decorated side outwards, and unfold. Repeat on the other diagonal.

3. Your square should now have folds as below. Push inwards at the points indicated, the folds you have made should mean the paper folds easily into a triangle, as shown.


4. Take the bottom right corner of the top layer, and fold it up in between the layers to the top point, as shown in the picture.


5. Do the same with the bottom left corner. Your piece should now look like this.


6. Repeat the above steps with the other 7 squares.


7. Now we can create the rosette! Take one of the pieces, and hold it with the right angle pointing downwards.
Lift the right hand side of the top square layer, and dot some glue on the triangle layer (although I would suggest ensuring you know how the pieces will sit together before gluing!), under where the square was. Don't put the top layer down yet!
Take a second piece and, with the right angle pointing towards the centre of the rosette, slide the triangle layer of the first piece in between the top and bottom layers of the second piece. Press down. This should look like the picture below.


8. Now add the third piece in the same way, working clockwise.


9. Continue adding the pieces in the same way until you get to the last piece.


10. This one is slightly more tricky! Add the final piece as you have been doing before, keeping it on top of the first piece. To finish off, you now need to lift the right hand side of the top square layer, and dot some glue on the triangle layer as before. Now carefully lift the square layer from the first piece, and slot the triangle layer of the final piece underneath it. Press down first the square from the first piece, then the square from the final piece.


Voila! A finished rosette!

You can experiment with different papers and colours to create a variety of effects. Have a go!


There are many different types of folds for tea bag folding, if you have enjoyed this one and wish to learn more, let me know! I will happily make further tutorials for different folds if there is demand for it!

5 May 2008

Triple Embossing

This weekend I visited the Tulip Toppers shop in Shipley market for a tutorial on triple embossing from Meryle Holland. Triple embossing is something I have attempted in the past, when I was working a lot on paper crafts, but I never quite got the hang of it.

Well, the tutorial was great! Turns out my main problems were that I was using the wrong type of embossing powder (I didn't even know there were different thicknesses of it until this tutorial!) and that my heat gun makes things more difficult, as it is quite hot and powerful. After being shown the technique by Meryle, she let me have a go whilst she was there, both with her heat gun, and mine, so I could see the difference.

As soon as I left, I came pretty much straight home to try the technique out! In the picture above, the japanese ladies are tiles which I made whilst at the tutorial - on these, the triple embossing makes a glass-like effect on top of the pictures. The others are items I made at home whilst practising the technique - the star one was stamped and coloured, then embossed on top like the tiles, whereas the hearts were triple embossed, and then stamped into the embossing. I then used rub'n'buff over the top to make the text stand out a little more.

I do love learning new things!

26 April 2008

My Craft Space


This is where I spend many hours – my craft space!

I am lucky to have a room pretty much dedicated to all my craft stuff, with my corner which has my computer, sewing machine, books, and many other bits and bobs! It is rarely tidy, as I am often working on a number of projects at one time (I take after my dad in this respect!). I have added the bookshelves only recently, and I love having them there, it is so useful! On the “washing lines” on the wall I have art that I have received in swaps on various mail-art sites.

I’m not looking forward to when I have to move out of this house into a smaller one, I love having my own craft room!

Where do you craft? What is your craft space like? I’d love to see where you craft! If you can, e-mail me a picture and short description, and I will add them to a gallery shortly.