26 May 2008

Yummy Banana Muffins!


I made some of these muffins a few weeks ago, and everyone loved them (as you can tell, I was so proud that I didn't even want to wait to take them out of the tray and arrange them before taking pics - I just wanted to eat them!!). I then lost the recipe and was gutted! I have since found the recipe again, and so I am going to share it with you, both so you can make lovely muffins too, and so that I always know where it is!

You will need:

2 eggs
240ml milk (I used semi-skimmed)
120ml vegetable oil
100g granulated sugar (I used the low-cal stuff to make these slightly better for you!)
100g soft brown sugar
375g plain flour
4 teaspoons baking power
1 teaspoon salt
1 teaspoon cinnamon (optional!)
2 small bananas, roughly chopped

To make:
  1. Preheat oven to 200 degrees/gas mark 6.
  2. Sift the flour, baking powder and salt into a bowl, ensuring they are thoroughly mixed.
  3. In another large bowl, add the eggs, milk, oil and sugar, and beat together.
  4. Add the flour mix to the liquid mixture and roughly mix. Do not worry about getting a smooth mixture!
  5. Stir in the bananas and the cinnamon.
  6. Spoon the mixture evenly into 12 muffin cases, and bake for 25 minutes.
Yum! Ensure that when you take them out, if you put a knife into them it comes out clean - if not, cook for a further 5 minutes. Allow to cool, and then eat! :)

You can try this recipe with other fruit - I intend to try it with apples and slightly more cinnamon next time - tasty goodness!

14 May 2008

Tea Bag Folding - Tutorial


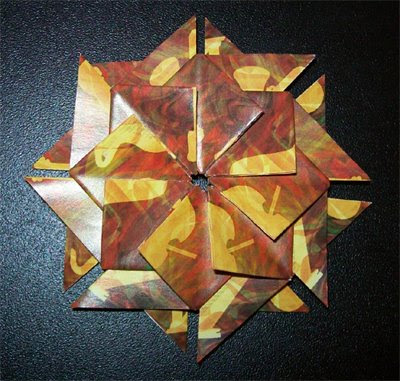
Since it has been a while since my last blog, I thought I would treat you to my first tutorial! One craft I loved when I was paper crafting a lot was origami, and tea bag folding follows similar techniques to create pretty rosettes!

Tea bag folding got its name as it was originally done with the little "envelopes" that tea bags came in, as these were usually decorated papers which looked lovely as rosettes. Nowadays, these envelopes are more rare, but this technique can be done with any paper. Only one side of the paper will show, so do not worry if the paper you have is only decorated on one side.
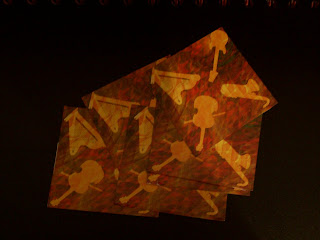


You Will Need:


* 8 squares of paper (all the same size)
* Glue


1. Take one of the squares, and fold it in half horizontally, decorated side inwards. Unfold.
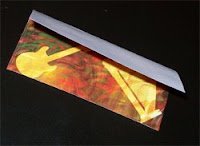

2. Now fold diagonally, decorated side outwards, and unfold. Repeat on the other diagonal.

3. Your square should now have folds as below. Push inwards at the points indicated, the folds you have made should mean the paper folds easily into a triangle, as shown.


4. Take the bottom right corner of the top layer, and fold it up in between the layers to the top point, as shown in the picture.


5. Do the same with the bottom left corner. Your piece should now look like this.


6. Repeat the above steps with the other 7 squares.


7. Now we can create the rosette! Take one of the pieces, and hold it with the right angle pointing downwards.
Lift the right hand side of the top square layer, and dot some glue on the triangle layer (although I would suggest ensuring you know how the pieces will sit together before gluing!), under where the square was. Don't put the top layer down yet!
Take a second piece and, with the right angle pointing towards the centre of the rosette, slide the triangle layer of the first piece in between the top and bottom layers of the second piece. Press down. This should look like the picture below.


8. Now add the third piece in the same way, working clockwise.


9. Continue adding the pieces in the same way until you get to the last piece.


10. This one is slightly more tricky! Add the final piece as you have been doing before, keeping it on top of the first piece. To finish off, you now need to lift the right hand side of the top square layer, and dot some glue on the triangle layer as before. Now carefully lift the square layer from the first piece, and slot the triangle layer of the final piece underneath it. Press down first the square from the first piece, then the square from the final piece.


Voila! A finished rosette!

You can experiment with different papers and colours to create a variety of effects. Have a go!
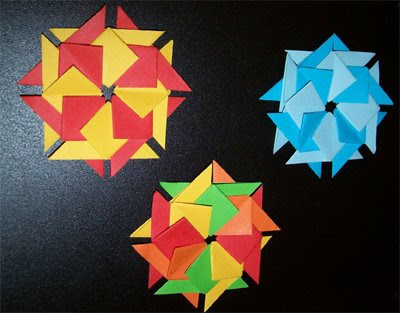

There are many different types of folds for tea bag folding, if you have enjoyed this one and wish to learn more, let me know! I will happily make further tutorials for different folds if there is demand for it!

5 May 2008

Triple Embossing

This weekend I visited the Tulip Toppers shop in Shipley market for a tutorial on triple embossing from Meryle Holland. Triple embossing is something I have attempted in the past, when I was working a lot on paper crafts, but I never quite got the hang of it.

Well, the tutorial was great! Turns out my main problems were that I was using the wrong type of embossing powder (I didn't even know there were different thicknesses of it until this tutorial!) and that my heat gun makes things more difficult, as it is quite hot and powerful. After being shown the technique by Meryle, she let me have a go whilst she was there, both with her heat gun, and mine, so I could see the difference.

As soon as I left, I came pretty much straight home to try the technique out! In the picture above, the japanese ladies are tiles which I made whilst at the tutorial - on these, the triple embossing makes a glass-like effect on top of the pictures. The others are items I made at home whilst practising the technique - the star one was stamped and coloured, then embossed on top like the tiles, whereas the hearts were triple embossed, and then stamped into the embossing. I then used rub'n'buff over the top to make the text stand out a little more.

I do love learning new things!

26 April 2008

My Craft Space


This is where I spend many hours – my craft space!

I am lucky to have a room pretty much dedicated to all my craft stuff, with my corner which has my computer, sewing machine, books, and many other bits and bobs! It is rarely tidy, as I am often working on a number of projects at one time (I take after my dad in this respect!). I have added the bookshelves only recently, and I love having them there, it is so useful! On the “washing lines” on the wall I have art that I have received in swaps on various mail-art sites.

I’m not looking forward to when I have to move out of this house into a smaller one, I love having my own craft room!

Where do you craft? What is your craft space like? I’d love to see where you craft! If you can, e-mail me a picture and short description, and I will add them to a gallery shortly.

19 April 2008

Teddies For Tragedies


Teddies

Do you knit or crochet , and want to put your skills to use, helping bring smiles to children all over the world? Teddies For Tragedies is a site which aims to bring together crafters who would like to make and donate teddies and charities who will accept and deliver these teddies where they are needed. The patterns for the teddies are on the website, along with the appropriate safety standards (make sure you sollow these!) and information about how to get in contact with the charities who deliver the teddies.

If you want to help with this scheme, please spread the word by posting about the site on your blog or website, or by making some teddies and sending them out into the world!

(Thanks to Four Good Corners for letting me know about this scheme!)

14 April 2008

And The Winner Is...


Winner

The moment I know you've all been waiting for... time to announce the winner of the giveaway! The winning name was drawn out of a hat by my very helpful boyfriend, and the winner is... Kate! Congratulations!

The runner up, winning 25% off their next order with fearfulpenguin.com is Meghen!

Thank you to everyone who entered, and well done to the winners!

8 April 2008

Feltpods!


Apple feltpod Podzilla

If I ever manage to get myself an Ipod (yes, I am one of the few who are still pod-less!) one of this first things I would do is buy myself a feltpod from Strawberrykitten at Etsy. I love her feltpods so much, they are so fun and different! However, rather than me talk for pages about how cute the felt pods are (so adorable!), I thought I would let Sian who runs Strawberrykitten do the talking!

Tell me a bit about yourself!

I’m from sunny Doncaster, South Yorkshire. I currently work full time in a large bookshop (naming no names ;)) only creating work in my spare time, I do this in my large attic room which is usually a tip! I studied fine art at Sheffield University, only to realise 3 months in I didn’t want to be an artist I preferred craft. I’ve been making things ever since. I dabble in so many crafts, photography, card making, plush, quilting, weaving, felting etc etc but at the moment I’m concentrating on teaching myself jewellery making and my felt work, I’m also dipping back into photography again.

I love your unique IPod covers, what first gave you the idea to start making these?
I guess this particular range stemmed from me wanting a cool case for my IPod touch, I’ve always liked robots and I had a load of felt. So I gave it a go, the first attempt looked real bad compared to the final range, all big and floppy looking! From there I just thought about what animal or object sounded good with pod in its name, Podzilla, Ladypod etc. I really love my Feltpods!

What inspires you?
It sounds cliché but I really do get inspired by most things. I think I go through phases with my inspirations as I do with my day to day styles. At the moment I love really colourful work and find a lot of inspiration for this in modern interior design magazines and high street shops like the US urban outfitters. My taste really does vary though as I love really traditional art and design as well as quiet graphic work. I think because I dabble in so many crafts I can be inspired by so many things.
Ladypod
Do you think being in the UK has had any effect (positive or negative) on the experience of starting out as an indie seller, compared to, say, the US?
I’m not sure as I’m just starting out really, I guess the internet is where it’s at in this kind of business nowadays and Etsy although an amazing community, being based in the US I sometimes feel we don’t benefit from the face to face communities that Etsy clearly has. I would love it if we in the UK had an Etsy equivalent; I think it would open up opportunities to UK crafters.

What other website would you recommend?
I read so many blogs on a daily basis, one that I really love is www.mypapercrane.com I love her work and love reading about her life, I’m ever so jealous of her!

There are lots of different styles of felt pods in her Etsy shop, including robots and podzillas, but my absolute favourite has to be the Ladypod (shown, right) which I absolutely adore! I nearly want to buy an IPod just so I can buy this cover. Strawberrykitten also sells beautiful handmade silver rings, and will make custom feltpods on request.